How to create a Collection / Storefront
Collections are an easy way to group niche campaigns or products. You can create as many collections with as many campaigns as you'd like, there are no limits.
Sellers who create & advertise collections average 15% more sales!
To create a collection:
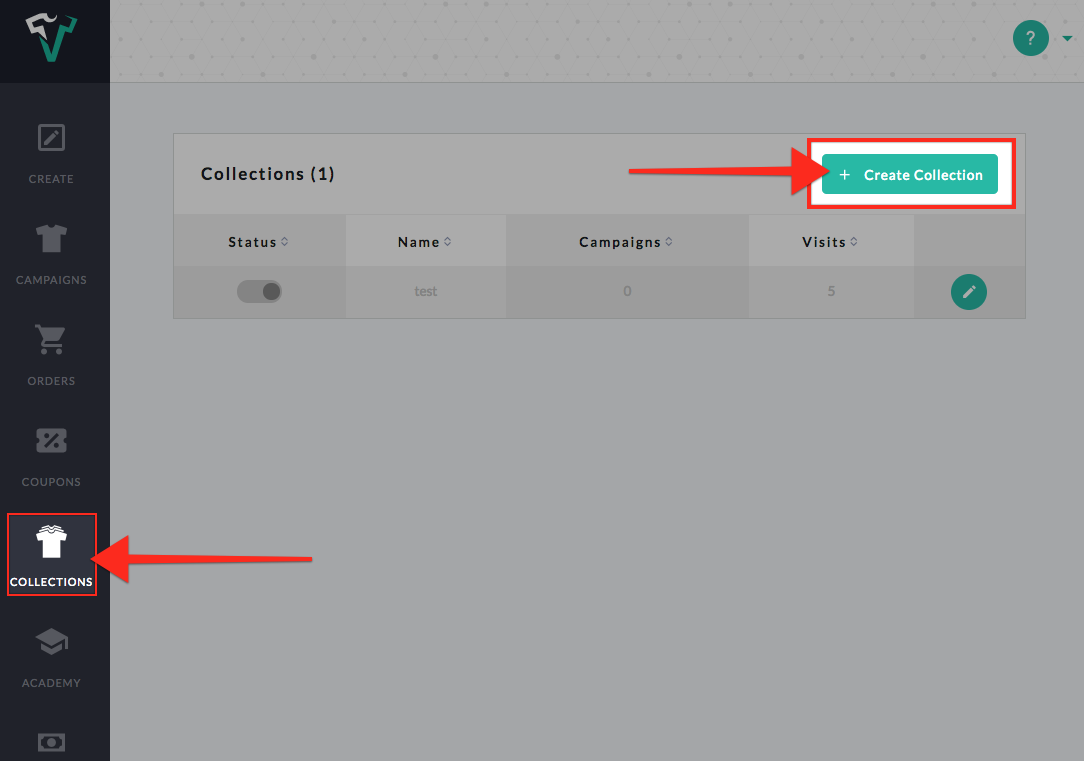
Click the "Collections" icon to the left in your admin panel. Then click the "Create Collection" button (top-right).
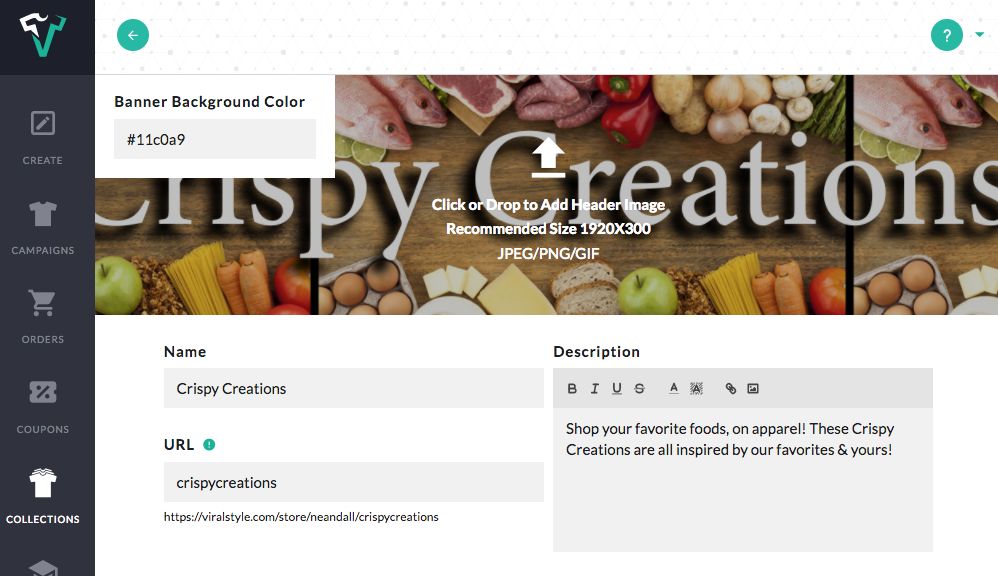
Banner Background Color: If you are uploading a PNG Header Image without a background color, you can type in your preferred color code to fill the background behind your image.
Header Image: You'll see the recommended size & required formats for this image. You can Click or Drop to add the image from your computer.
Name: This is the title/name of your collection. You may want to use a niche related name like "Dog Lovers" or "Baseball Fans". In this case I've used "Crispy Creations" because my collection is "Food" related.
URL: This is the Slug at the end of your stores url. Viralstyle will generate the "https://viralstyle.com/store/public-name" portion for you, so in the example below I've used "crispycreations".
https://viralstyle.com/store/public-name/crispycreations
Description: Create a sense of urgency or promote your brand here. This should get your customers excited to BUY NOW, but also explain what/who you are!
Adding Products to your Collections:
There are 2 ways to add campaigns to your collection:
1.) To use the tag-based collection tool, turn the "Tag Based" toggle to the ON position. Then, type the tag in the "add a tag" field. In this case I've used the tag "FOOD" because my collection is food related.
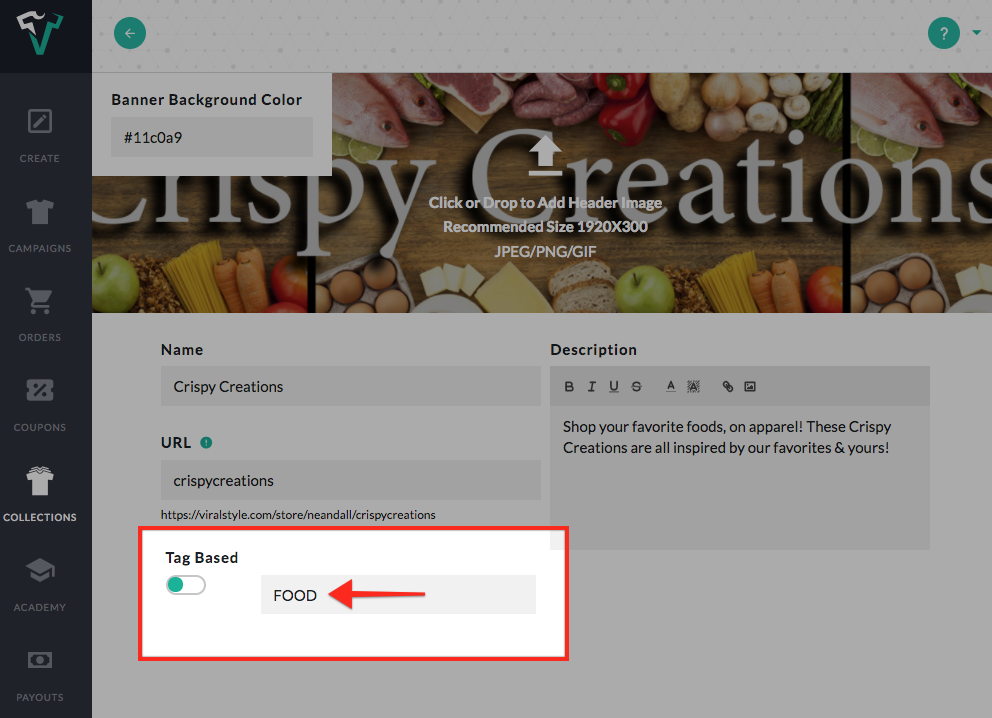
If you add this same collection tag to a campaign during the launch process in the tag field (see below), it is automatically added to this collection with a matching tag!
Adding a tag when launching a campaign:

2.) Selecting campaigns to add to your collection manually is quick & easy. Click the "Edit Campaigns" button, and click the products you'd like to add. You can also drag & drop the campaigns to adjust the order in which they appear on the collections home page. When you are finished adding & adjusting, click the "Create Collection" button to save.

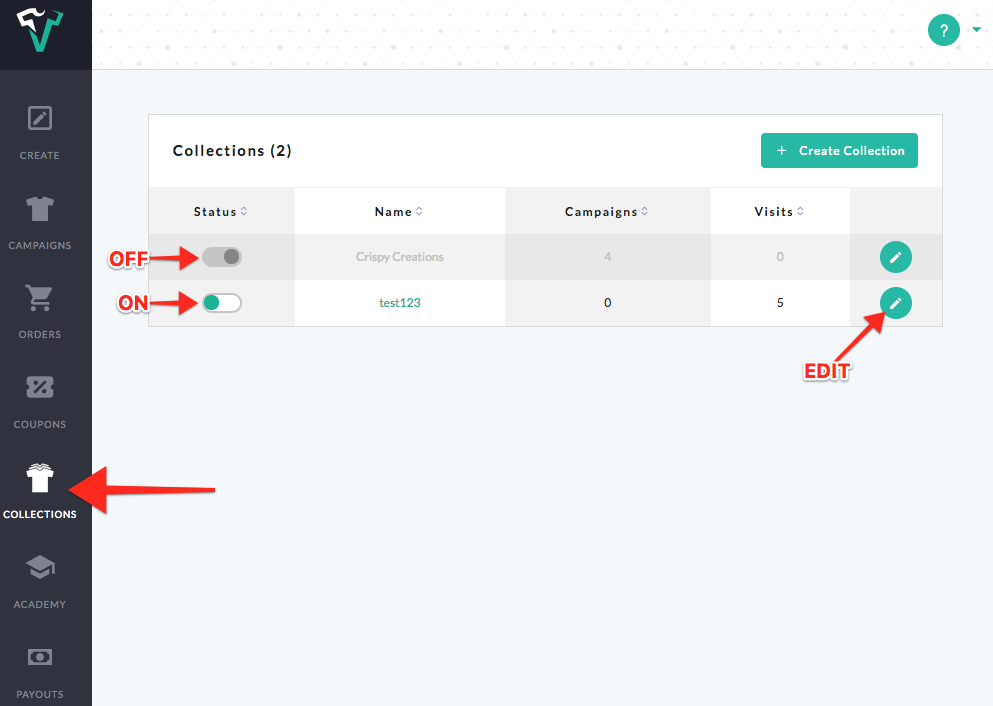
After you have created a collection, you must turn in ON so that it is LIVE and available for purchasing. Click the "Collections" icon to the left in your admin panel, then click the toggle to turn on/off. You can also "Edit" by clicking the edit icon to the right of each collection in question.
Collections are instantly created and grouped campaigns are available for sale!

