How To Create A Custom Domain
STEP 1: Domain Name & Forwarding
This domain will be your brand, so choose wisely!
In the following example we have used GoDaddy.com to purchase the domain because of their easy set up. Our next step is to connect our new domain to the Viralstyle Premium server
1.1. After logging into GoDaddy, you should land on the “My Products” page by default. You can also click the “My Profile” icon on the top-right of your screen and click “My Products” to proceed (seen below).

1.2. To the right of the domain you’ve selected for Viralstyle Premium, click the “DNS” text to open and configure the IP address (seen below).

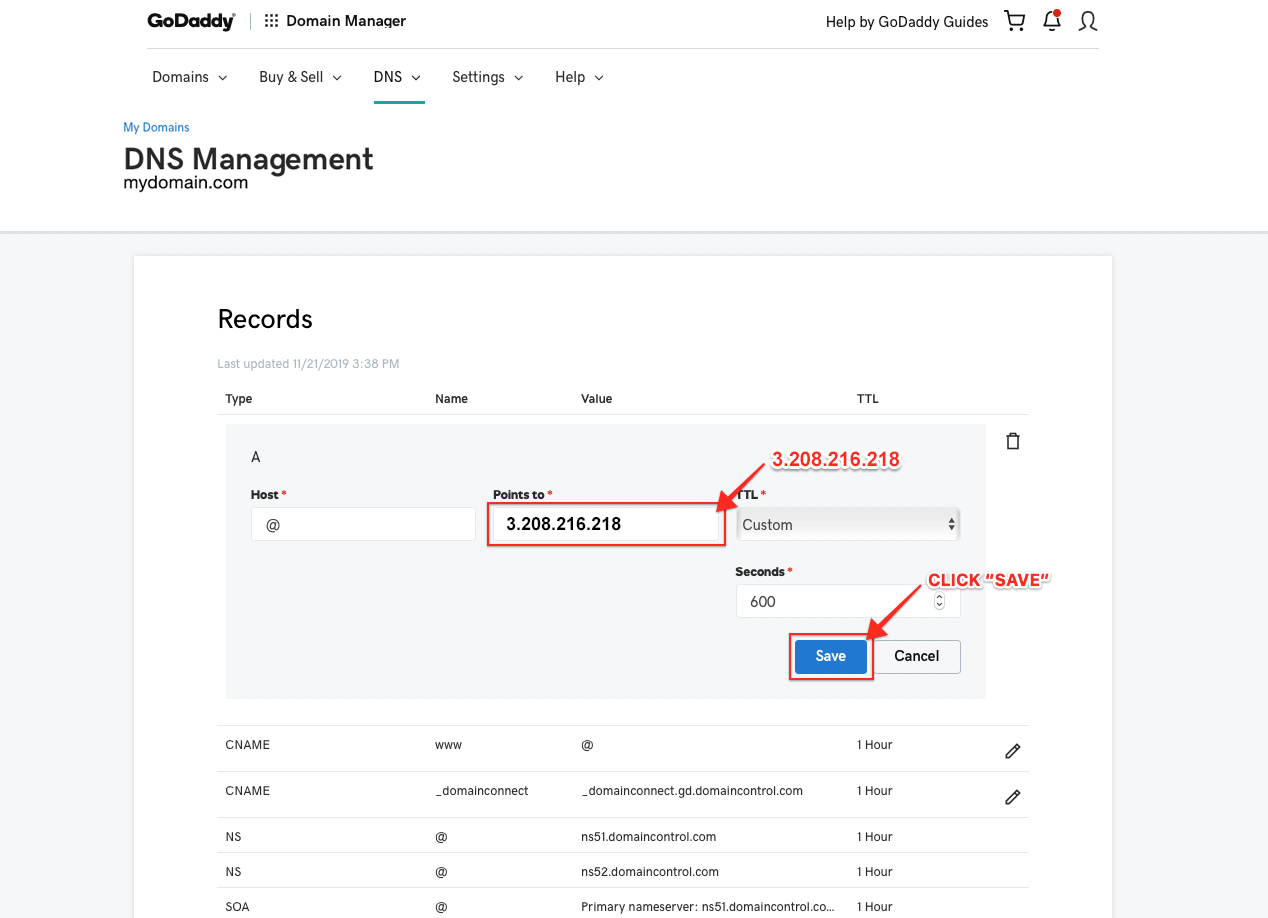
1.3. You’ll now see the “Records” page which will allow you to make updates. The first row Type “A” is what you’re updating, click the pencil icon to the far-right (seen below).

1.4. Here you will update the “Points to” information using the Viralstyle Premium IP. Delete the existing text/number, then add the following number 3.208.216.218
1.5. To avoid any connection issues, locate the second Type “CNAME” row and click the pencil icon to the far-right (seen below).
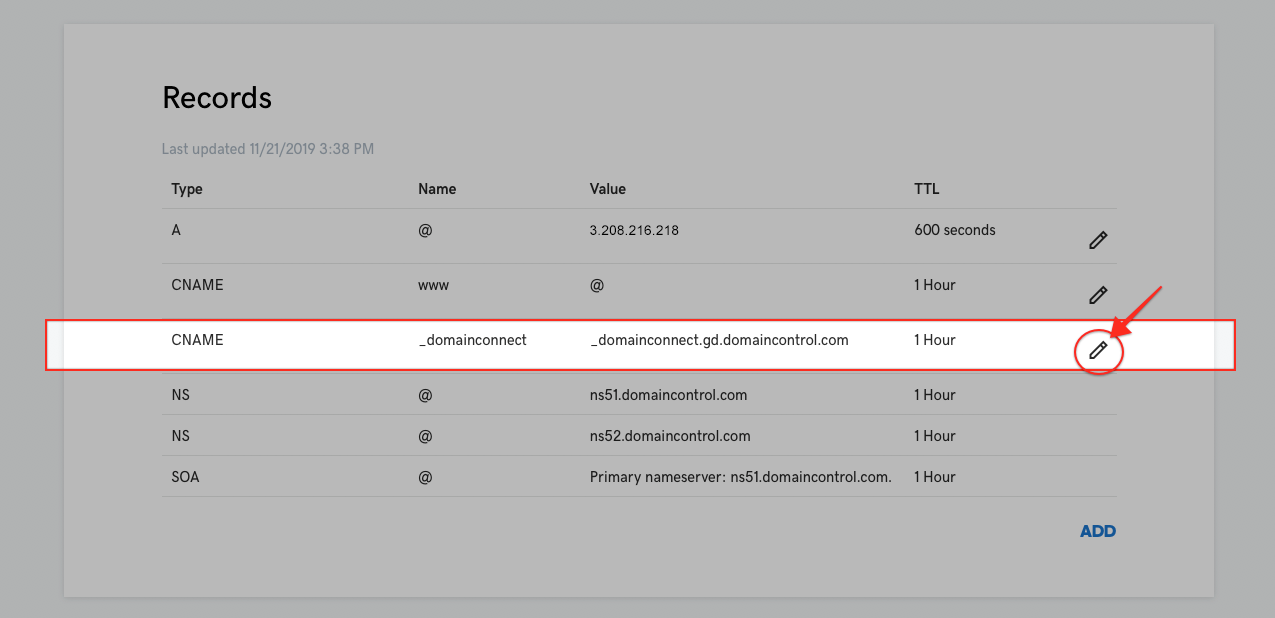
1.6. Click the “trash” icon, then click “Delete” when the pop-up appears – asking you to confirm (seen below).


STEP 2: Add Domain in your Viralstyle Portal
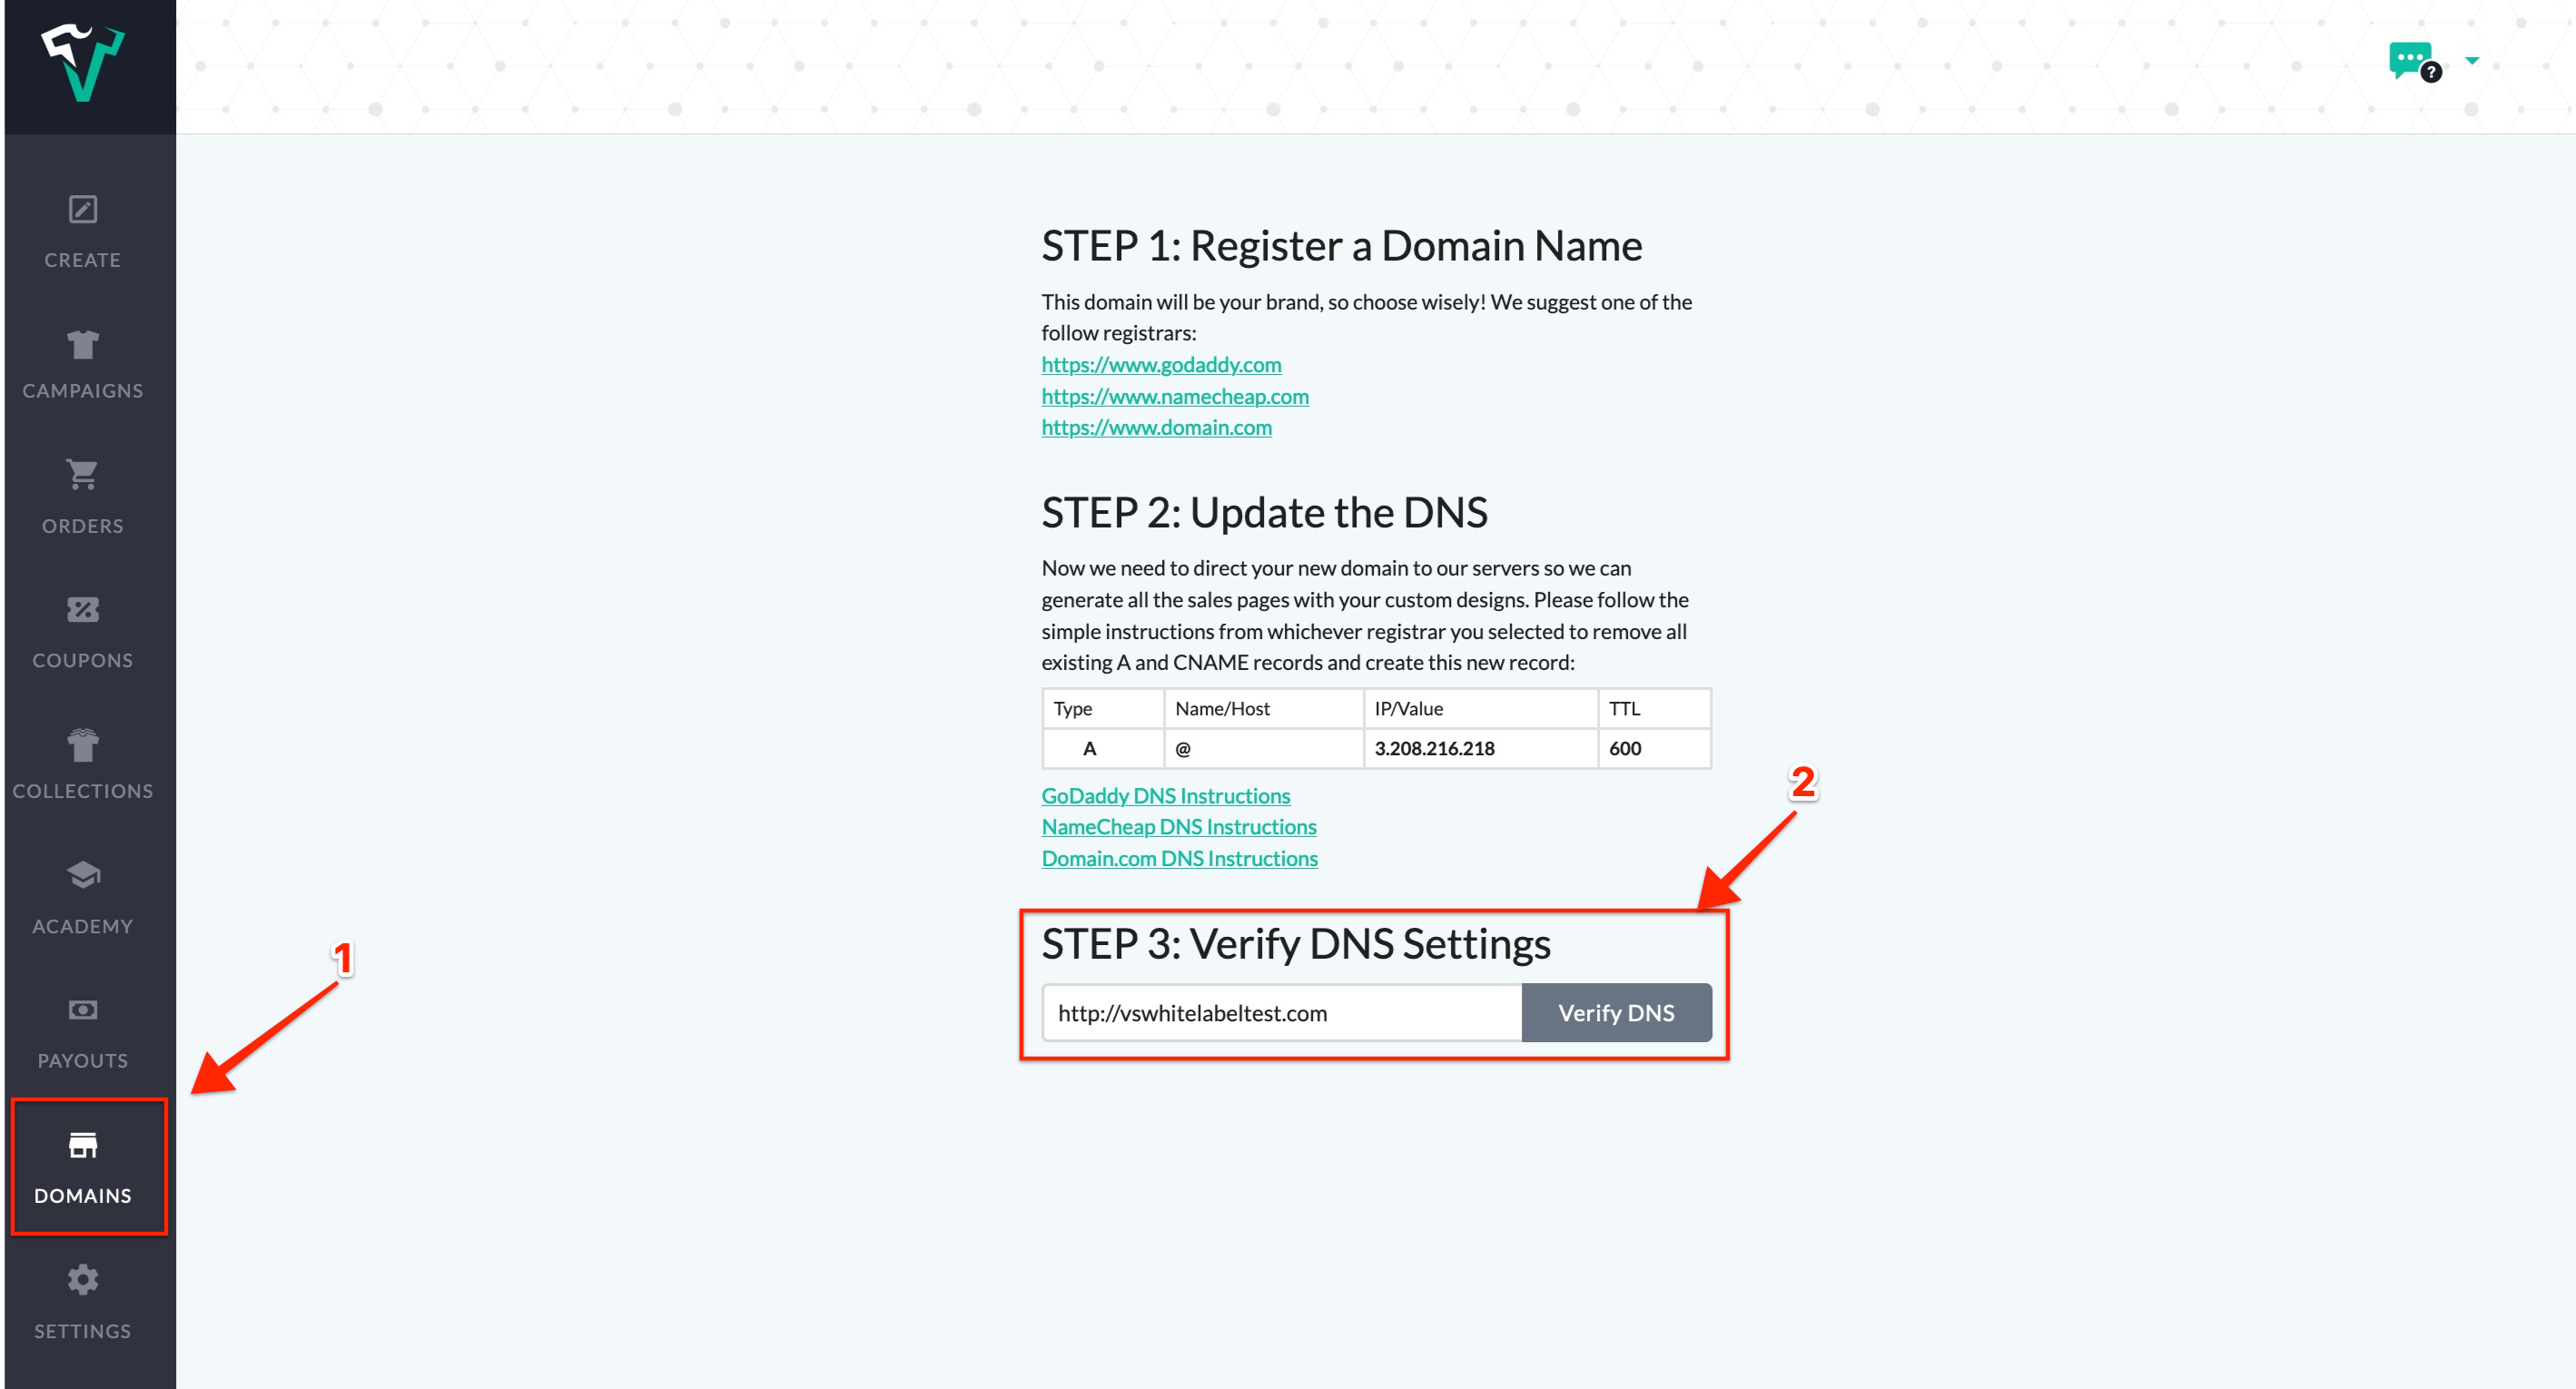
2.1. Go to the “Domains” tab on the Dashboard
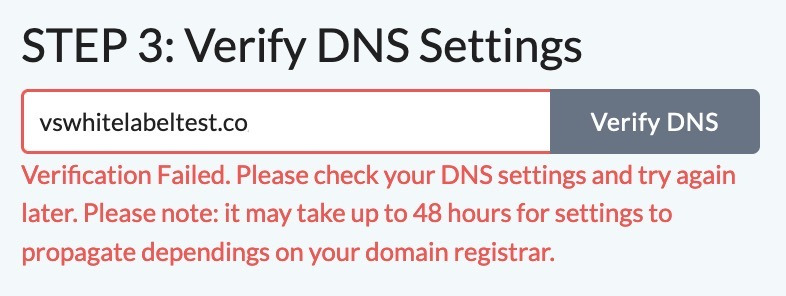
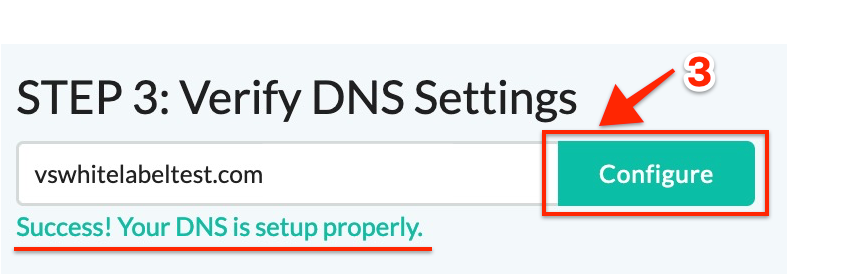
2.2. Input your domain URL in Step 3 and click “Verify DNS”
2.3. If your domain had been directed successfully, the “Success! Your DNS is setup properly” will appear.
2.4. Click on the “Configure” to add the domain to your account.
CONGRATULATIONS! You have connected your custom domain!
STEP 3: Branding & Company Name
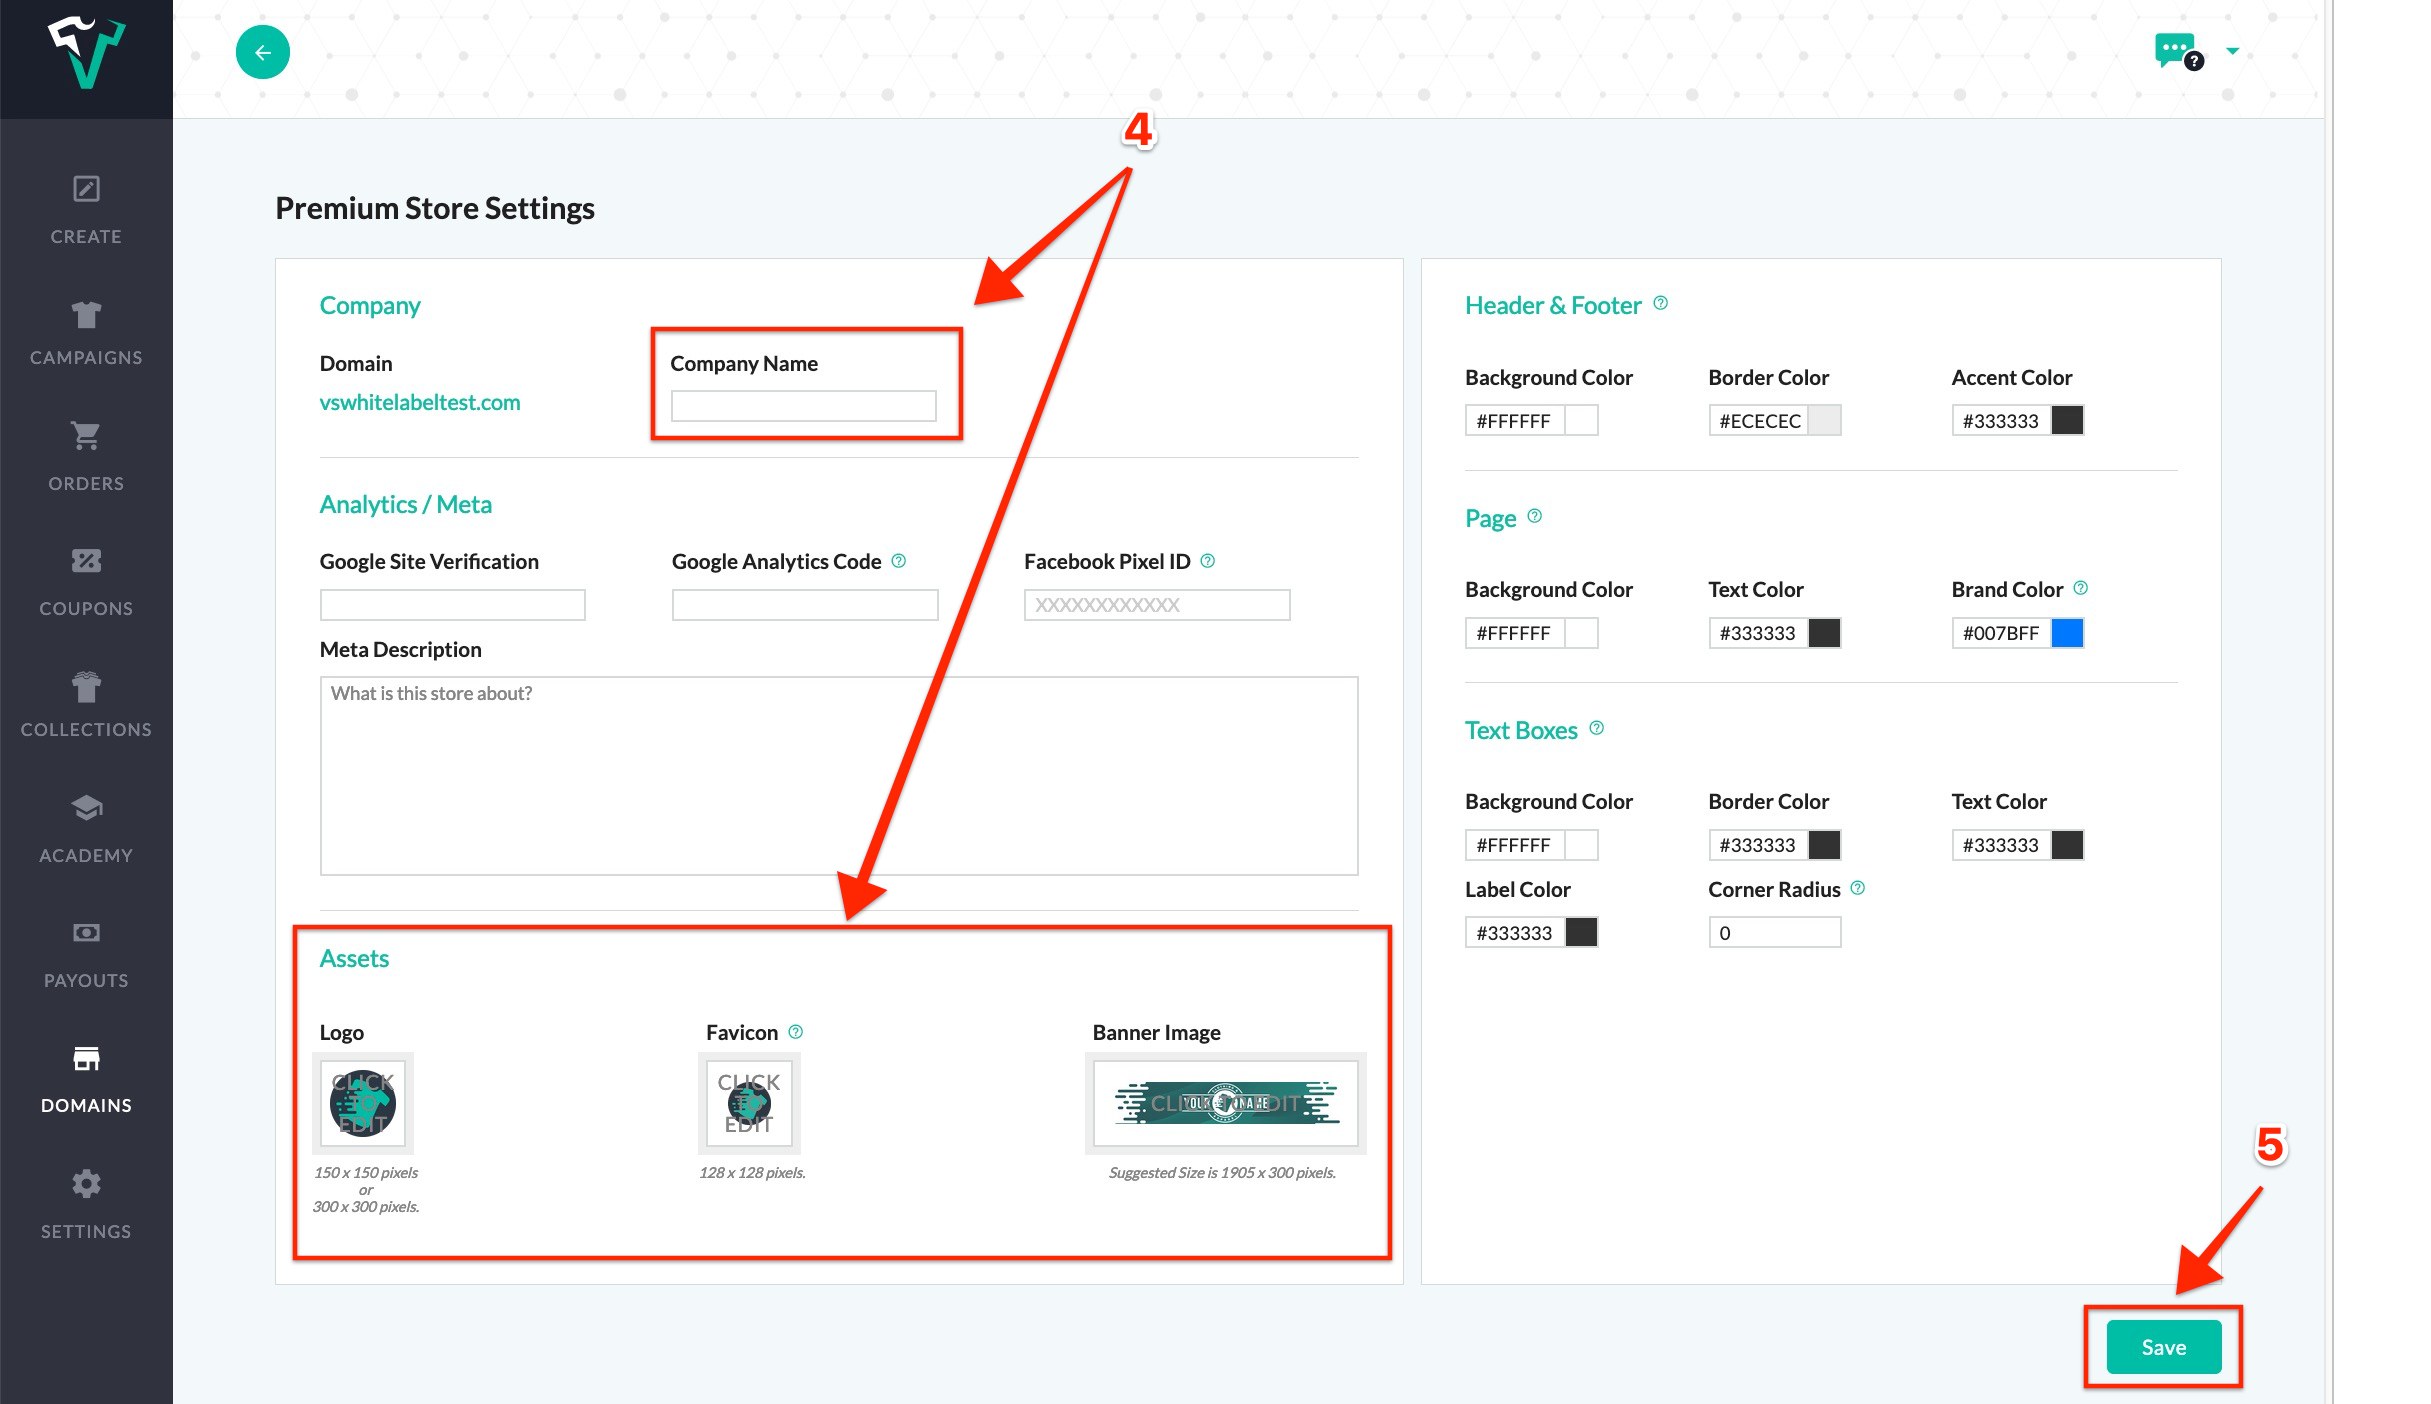
3.1. You will be directed to the Whitelabel store settings page. Please update your store Company Name (this is the name that you are comfortable with displaying in the Internet browser tab) and Assets (Logo, Favicon & Banner), then click “Save”
Required Dimensions:
- Logo: 150px by 150px (.png file)
- Homepage & Collection banners: 1905px by 300px (.png file)
- Favicon: 128px by 128px (.ico file)
3.2. Now you must choose a brand color, this color will be displayed throughout your site in the accents and the checkout buttons. You will be able to update your brand color and other theme colors in the future, but Viralstyle will assist with the initial set up.

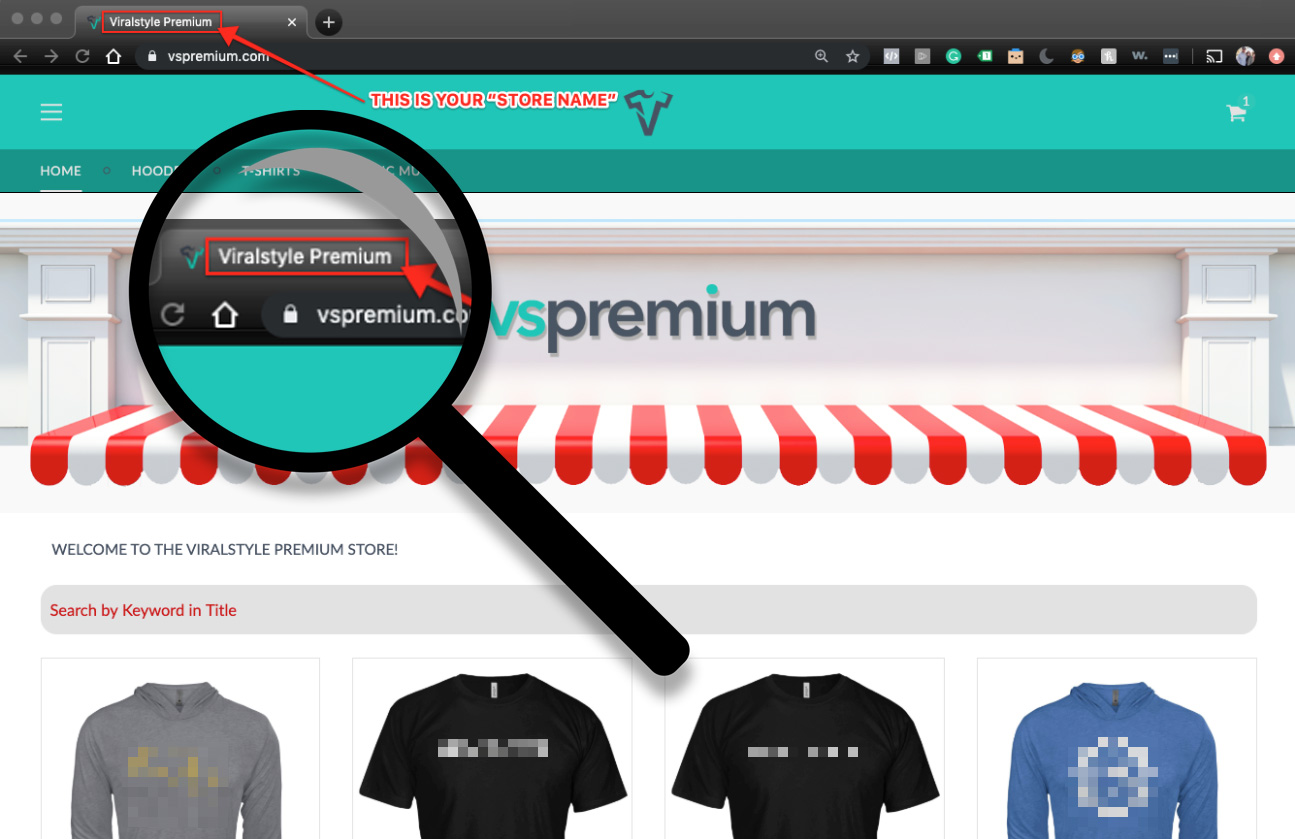
3.3. When creating a new Viralstyle Premium account you are eligible to select a Store Name. Please select a store name that you are comfortable with displaying in the Internet browser tab(s).
For more information, please reach out to the Client Services Department at clientsupport@viralstyle.com
NOTE: If the “Verification Failed.” error occurs, please double check your domain URL spelling or DNS settings.