How to Set Up Your Facebook Assets
Why use Facebook for advertising?
With so many options, deciding where to spend your marketing budget can be difficult. What makes Facebook particularly attractive for new and experienced business owners boils down to three things:
1. Driving traffic from an active and engaged user base
Facebook is a place where we connect with family and friends, and—as much as we hate to admit it—it’s pretty darn addictive. Facebook reportedly has more than three billion active monthly users, and those users spend more time on Facebook than on competing social networks. In addition, Facebook owns Messenger and Instagram, two other popular mobile apps accessible to Facebook advertisers through its advertising platform. That’s a lot of active, engaged traffic to drive to your landing page.
2. Targeting customers based on demographics, interests, and behaviors
Facebook is designed for sharing personal updates and information with your network, such as vacation photos, new songs you’ve discovered, and relationship statuses. All the likes and connections made on Facebook and Instagram create detailed user profiles advertisers can tap into through targeted ads. Facebook advertisers can match their products and service against a long list of users’ interests, traits, and behaviors, resulting in a higher likelihood of reaching their ideal customers.
3. Generating brand awareness
Most businesses have a Facebook and/or Instagram business page they use for connecting with their fans and customers on social media. When you decide to use paid ads on Facebook and Instagram, you can opt to have them come from your brand’s social pages. This often results in increased brand exposure and new followers for your company, which is one of the benefits of advertising on social platforms.
Setting up your Facebook Business Manager
Many of the people who give up on their Facebook advertising efforts do so because they set up their account incorrectly or become so overwhelmed by Facebook’s myriad ad options that they never make it to the point of actually running a campaign.
So, to start off on the right foot, you first want to ensure you set up your Business Manager account correctly.
Business Manager is the section of Facebook that houses your Facebook ad account, business pages, and other tools you’ll need to run your ads.
To create your Facebook Business Manager account, go to business.facebook.com and click Create Account.
Facebook will ask you for your business name, your Facebook business page (create one first if you don’t have one), your name, and your email address.
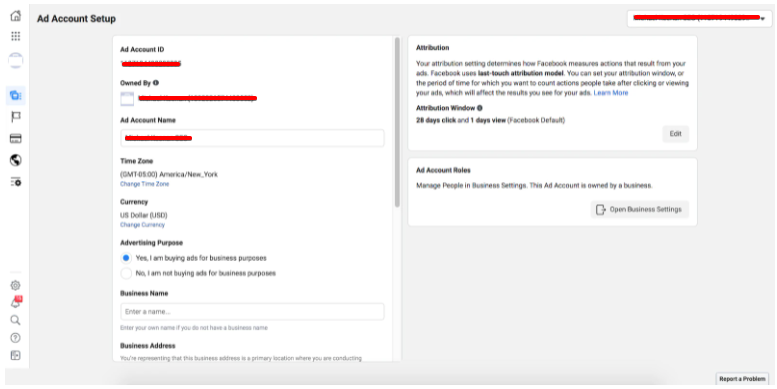
Create an Ad Account
Next, you’ll need to create or add an existing advertising account. This can be done by choosing Business Settings in the Business Manager menu, then clicking More Tools and Ad Account Settings.

You will be taken to a new window and given the option of adding an existing ad account, requesting access to an ad account, or creating a new ad account. If you’ve never advertised on Facebook before, click Create a New Ad Account and follow the prompts.
Create a Facebook Page
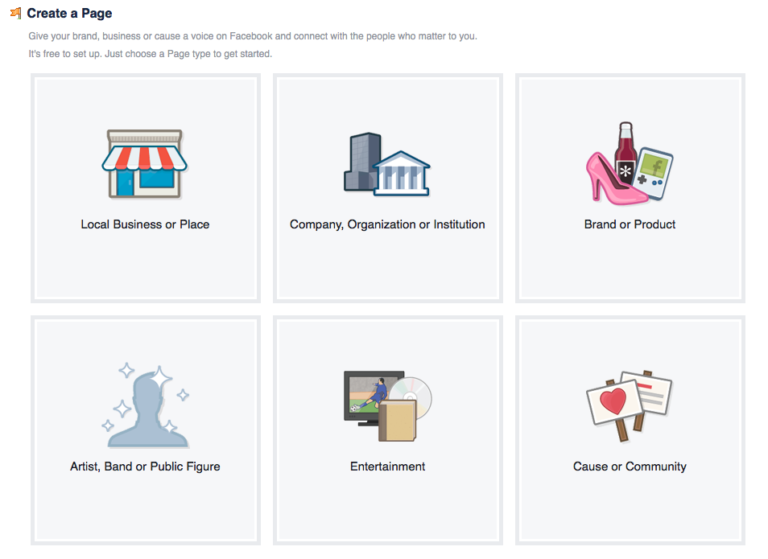
Once you’ve researched your audience and developed your design message it’s time to create a Facebook Page with this audience in mind. It’s best to set up a dedicated Facebook page and populate it with content related to your niche. Setting up a new page is super easy; log into your personal profile, click on the “home” tab and then click on “Create Page” in the menu on the left.
Quick Tips for Facebook Pages
- When creating a new page choose “brand or product” and select “clothing” as the product type
- Choose a page name that is related to your niche.
- Try to post weekly and share a variety of content; don’t just post about the products you’re selling, try to find engaging and shareable content that your audience will be interested in. You can check out similar pages for content ideas too!
- Keep in mind you don’t have to publish a lot of content, but you should make sure that the page has something to see if potential buyers visit or “like” your page.
- Take advantage of your page’s call-to-action button (CTA) and link to your Viralstyle campaign or store.
Now that you’ve set up Business Manager and connected it to your Facebook business page and ad account, your home screen should look like this:
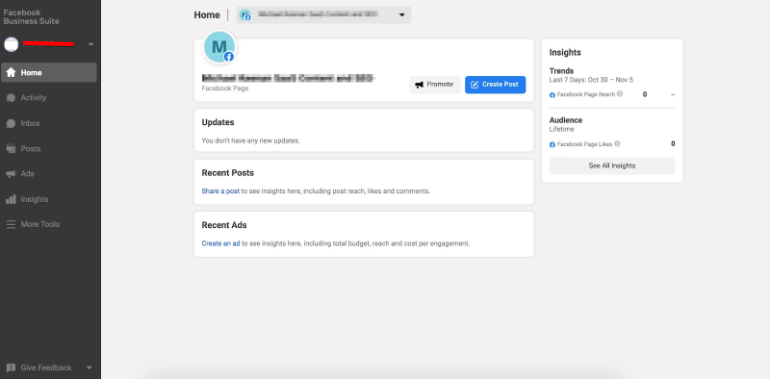
This is your advertising hub, where you can navigate to all the different areas of your business on Facebook.
Installing the Facebook pixel
The Facebook pixel is the connection point between your Facebook ads and Viralstyle. The pixel is a tracking code you need to create within your Business Manager account and then add to Viralstyle before you begin paying for ads. It shows you all the actions being taken by visitors coming to your website through your Facebook ads. Essentially, the Facebook pixel tells you not only if your ads drove results but which specific audiences and pieces of creative those conversions came from.
Create a pixel in Business Manager
- Go to Business Settings in Business Manager.
- Select your business.
- Click Data Sources.
- Select Pixels.
- Click the + Add button.
- Type in a name for your pixel.
- Optional: Enter your website URL.
- Click Continue.
- To install your pixel on your website, click Set up the Pixel Now. If you’d like to stay in Business Manager, click Continue Managing My Business.
Add Facebook Pixel to Viralstyle Account
Click the “settings” icon on the bottom-left of your screen in the admin panel. Then, click the tracking tab at the top of your screen in the menu bar. After adding your default pixels, remember to click the “save” button. You can get a full tutorial in our knowledge base.

